Product Reviews Now Available

We’re excited to announce that we have now released product reviews, and they are available and included in every Spiffy Stores plan at no additional cost!

We have been working away updating themes to include a way for your customers to add reviews, and for them to be displayed beautifully in your store… and most themes are finished! The last theme we’ll be updating (the Adelaide theme) should be available next week.

With the addition of the built-in mail after purchase email, you should be able to generate a ton of product reviews. These reviews are also indexed by Google and can be a great way for you to generate some buzz around your store and your products.

Reviews and the mail after purchase email function are included in all plans and it takes just a few minutes to set up.

To activate reviews in your store, you’ll need to firstly ensure you have updated your theme to the latest version. We have instructions on how to do that here.

If your store has a custom design, or updating your theme seems a bit difficult… it’s likely you’ll want us to do this for you for a small fee. Please email support@spiffystores.com.au requesting that we update your theme to include product reviews, and we’ll let you know when we can book you in.

Once your theme is up to date, you can then enable product reviews in the Products section of your store’s admin.

You can enable the mail after purchase function in the Preferences -> General Settings section of your store’s admin.

You can add a logo or edit the automated mail after purchase email in the Design & Assets -> Email Templates section of your store’s admin.

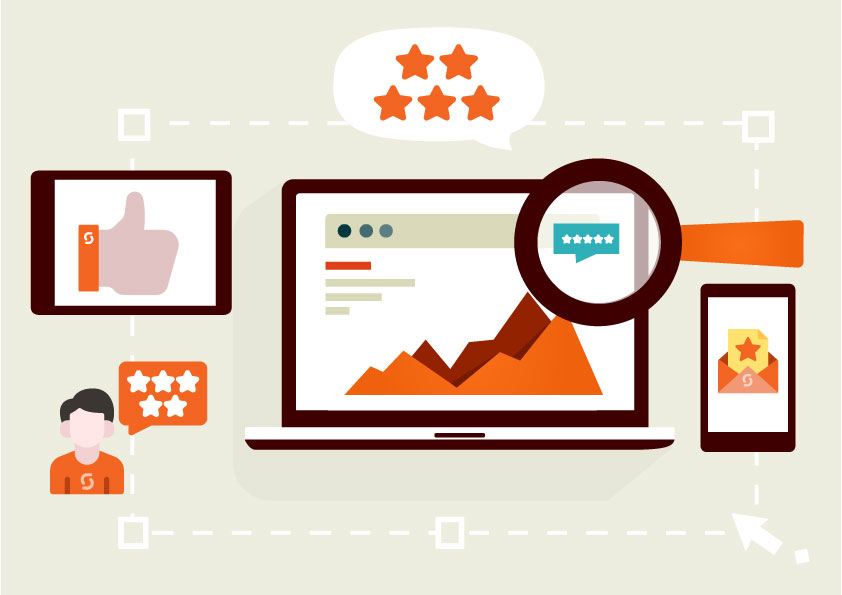
We’ve made product reviews available to all stores for many reasons… but the main one is that they can make a huge difference to your store’s performance. How? You may ask…


8 reasons why you need Product Reviews in your store now!

Reviews can help your store increase sales, and can help you to convince customers to leave more of them. Read on to get started.

1. Product reviews help create more informed customers

Product reviews can contain a lot of extra information that can’t be found anywhere else. Reviews can mention things like durability, colour, sizing, and so much more.

It’s personal insights such as “a little narrow for my wide feet” that help customers to be informed and find products that they will love.

2. Valuable insight helps you to improve

Reviews can also help you better understand your products. You can spend hours using a product, but chances are your customers are going to notice things you never would. That means your customers can give you ideas for improvements, or even excellent ideas on how to market your products.

3. Increased transparency

It can be scary allowing customers to openly review you, but showcasing feedback – good or bad, shows you have nothing to hide, and value your customers opinion. The ability to reply to a review also allows you to acknowledge that you’re not perfect, or your products may not be perfect for everyone. Replying to a review can also show that you have faith in your product range.

And you needn’t worry about those odd negative product reviews – 68% of consumers trust reviews more when they see both bad and good review scores.

4. Increased trust

The immediate benefit of reviews is that they can make your future customers feel that much more confident. The more reviews you have, the more convinced a shopper will be that they’re making the right decision.

5. Social proof your products

We all want one everyone else has, right? That’s how trends work.

Product reviews can make every one of the items you sell super desirable. Instead of seeing every positive product review as a great piece of feedback, see it as a vote in a popularity contest.

Additionally, if customers share products they’ve reviewed across their social networks, it’s more exposure for those products and your brand.

6. SEO benefits

User-generated content provides Google with the thing it loves most: content, and lots more of it than mast store owners can generate themselves. Product reviews are usually full of really relevant, rich keywords, to help further build context around your eCommerce store. This can dramatically improve your Google rankings.

Plus… not sure if you’ve ever seen them, but you will see stars displayed under product listings in organic search results. These result in an increase in click-through rates. This is also one of Google’s ranking factors, so – yes… this will also help you reach the top spots in search ranking.

7. Increased Visibility in Google Shopping

Google Shopping is extremely competitive, and the addition of stars to your product listings can make all the difference when it comes to attracting the attention of potential customers.

8. More conversions and bigger baskets

As a result of your customers being more informed, more confident, and more trusting they’ll be more likely to convert. Not only that, but they’ll probably also buy more. We’re talking more, bigger sales.

According to statistics, reviews produce an average of 18% uplift in sales, and customers who visit a site and interact with reviews spend 11% longer on the site than those who don’t.

Trying to compete online without product reviews can be an uphill battle. Customers are beginning to expect reviews as standard. So take advantage of our new feature, and you’ll see a whole host of amazing benefits that will help you continuously adapt and improve.

There are many ways to collect reviews, and we’ll have another article or two on collecting product reviews in the weeks to come.

How to use Pinterest to promote your online store

You must have been living under a rock if you haven’t heard of Pinterest, the “scrapbook” website that lets its users collect images in themed albums called ‘boards’.

It’s a very powerful social network that’s inspired people all over the world to share their interests and ideas through images, and connect with others by liking, commenting and re-pinning to their own boards.

Pinterest was launched in 2010 and has been growing at a mind-blowing rate. It now gets around 1.5 million unique visitors a day and boasts nearly 73 million monthly active users, making it the fourth most popular social media platform in the world.

Pinterest is a gift for retailers

Because Pinterest is so visual, it’s a great promotional platform for companies selling products like yours.

If you’re looking to get more traffic, exposure and attention for your Spiffy store, tap into Pinterest’s enormous popularity. A US RichRelevance Shopping Insights study has found that Pinterest users deliver a bigger average order value on retail sites than those coming from Facebook or Twitter!

Get ready to pin your wares

Before you dive in and start pinning your goodies up for all to see, ensure your website content is optimised. You’ll be pinning product images directly from your Spiffy store, so you’ll need great quality photos and clear descriptions (these encourage Pinterest likes and “re-pins”, which will widen your audience).

> Make sure your product photos are high quality, well lit and appealingly shot. I can’t stress this enough. Images are the currency of the Pinterest community so if your images aren’t great, you won’t attract attention or sharing!

> Give your product pages clear, specific descriptions and tags containing that product’s keywords so that Pinterest can index them easily. Think about the words and phrases people would type into search engines when looking for products like yours and use these when you write.

Once that’s taken care of, it’s time to set your brand up on Pinterest. This is the fun part! Pinterest have put together a simple guide to pinning to explore to get to know the platform better. In addition, I’ve made a few notes to get you started.

Set up your account

Jump onto https://business.pinterest.com/en  and click “join as a business” to sign up for a free business account.

Fill in the requested fields in the sign up form and make sure you read their terms for business use and are willing to comply with them.

Pinterest will then ask you to choose some board categories to follow as a starting point. It makes sense to pick ones closely related to your business.

Next, you’ll be offered the Pinterest browser button. Take it! It’s the easiest way to pin images you find all over the web to your boards. Once it’s downloaded, it’ll sit patiently at the top of your browser window waiting for you to click it and send an image you’ve found to one of your boards.

Once Pinterest has had a few seconds to digest all the information you’ve just given it, you’ll find yourself in your homepage – a visually rich scrolling page full of images. These images have come from the category choices you made a few minutes earlier.

The next step is to customise your page.

Brand your profile

At the top right of your page, you’ll see your user name (it should be your business name) in a button. Click it and you’ll be taken to a page where you can design your profile for you brand. Add your logo and fill out the other fields available, not forgetting to add your business keyword term in the description.

Have a good snoop around

Before you start creating your own boards, I suggest you do some simple research. Type your keywords and your competitors’ names into the Pinterest search box at the top of the page and see what comes up. Notice how products like yours are shown, how others title their boards and what’s popular. These insights will be helpful as you set up your own boards.

Create your own boards

Once you’re more familiar with Pinterest, start creating your own boards. You can do this by clicking the ‘create a board’ box on your profile page and filling out a few details.

Click on the board to choose an image to pin to it.

Don’t limit your boards to just your product categories; play around with different themes such as Christmas presents, best sellers and cocktail hour etc. Have fun with the board titles too – clever titles seem to attract more attention!

Social networking is all about authentic connections, so you might like to also set up a couple of boards on your own interests. This will help personalise your brand.

Pin images to your boards

Pin your product images directly from your online store to your boards so when a visitor clicks on the image, they’ll get sent directly to your website. Once you’ve pinned your images, you can edit the board cover to show the image that best reflects the board’s content.

When you’re exploring the web, use the Pinterest browser button to pin images you like to your boards. See, I told you it would come in handy!

Don’t just stick to standard pictures of your products – make your images as unique as you can. Try including photos or videos showing different uses for your products, or photograph them from different angles and in different lights. Files can be uploaded directly from your computer so they don’t have to be on your web store already.

Create detailed descriptions for each of your pinned images. Include your keywords when you write and put them in #hashtags at the end of the description. Add the link to your website product page and the price.

And there’s more!

Become an active member of the Pinterest community – it is a social network after all! Repin content you like that fits your brand, follow other people’s boards and comment on other pins. You can use the @ in front of a username to address them personally in a comment. This is not only fun but it’ll increase your exposure and number of followers.

Place Pinterest sharing and follow buttons on your product pages so that visitors to your Spiffy store can follow you and share your things on the network.

Install the Pinterest App onto your smartphone so you can browse boards, take snaps and pin on the move.

When you’re set up and have some good content, invite your connections to visit your board. Send out an email to your mailing list, and compose a tweet, blog or Facebook post that links to your Pinterest page and ask what they would like to see more of.

And finally, keep it up!

Keep pinning. People are more likely to come back if there is new content and it’ll widen your appeal.

Keep exploring and engaging in Pinterest. Continue to repin and engage with others on the network. Short but regular activity on Pinterest is better than a big push once in a blue moon.

Keep up with how others interact with your content. The number of likes, repins and comments you receive will reveal what the customers want from you.

As with all social media, you will have to devote time and effort to keep it fresh and interesting. But in return you’ve got a free promotional platform for your online store that can reach millions of people.

So go forth and pinnify!


How to advertise on YouTube

video advertisingDo you know you can run display and video ads on YouTube? Cool!

If you want to run video ads, you’ll need your own YouTube channel. That’s where you’ll store the videos. To find out how to go about setting your business up on YouTube, check out my post “Grab some YouTube action for your online store”.

The ad formats

There are a number of different ad formats on offer on this mother of all video channels. Before you begin creating your ad, it’s worth checking the AdWords policy page to understand the video specs you’ll need to adhere to and their advertising regulations.

In-stream ads – these are short video ads that play before or during a YouTube video, or on a Google Display Network video game or app. As the viewer can skip the ad after the first 5 seconds, you’ll only be charged if your ad’s watched for 30 seconds or more (or in its entirety if it’s shorter). That’s up to 30 seconds of free advertising!

In-display ads – these ‘static’ ads generally appear next to YouTube videos, in YouTube search results or the Google Display Network. They’re made up of a preview image and text. You’ll only be charged when someone clicks on the ad to view the video, so again, a certain amount of free advertising is available.

If you’re unsure what to make as a video, or how to go about it, read my post on creating video for your online store.

Set up YouTube advertising in AdWords

YouTube video ads are managed through Google AdWords. If you don’t have an AdWords account, head on over to our step-by-step guide and find out how to set one up. It’s not difficult.

To run YouTube ads, first link your AdWords and YouTube accounts via the ‘AdWords for video’ side navigation menu on any AdWords for video campaign page.

Set up a video advertising campaign in AdWords

To create your first video campaign, follow the simple step-by-step set up. Click ‘New campaign > Online video’ above the campaign table. Give the campaign a name, set the daily budget and choose your target locations and languages.

Create your ad

Next you get to create your video ad. Pick the video you want to use (remember it needs to be in your YouTube account), choose the format – in-stream or in-display – and fill in the ad details as requested.

Choose the type of people you want to see your ad

You can target your YouTube ads so they’ll only appear in front of the audience you choose. That way you’re not wasting money on people you don’t want to attract.

Select your target audience by typical demographics like age and interests. There’s also advanced targeting features like the contextual keyword option, so you can choose to show your ads near content relevant to those words.

If you want to ensure, or avoid, your ads appearing on specific pages in YouTube, the Managed Placements option will let you do that. It’s handy for targeting channels where the audience may be particularly tempting to you.

Once you’ve set up your ads, you’re good to go!

Check what’s working and what’s not

Just like text or display ads, AdWords offers you performance reporting on video ads. The reports reveal key data like which ads are the most popular and how much of the video is being watched.

By combining these insights with YouTube analytics reports, you’ll get a good picture of what’s working and what’s not so you can work on getting the best bang for buck!


Grab some YouTube action for your online store

man watching video wallHere’s something that may surprise you. YouTube is the second most popular search engine after the almighty Google. It gets more than 1 billion visitors a month looking for news, entertainment and answers.

If you want to create attention for your store and show off the cool things you sell, putting short videos on YouTube can open up a whole new audience for you.

It’s also worth mentioning that Google owns YouTube. You do the maths!

Setting up a business presence on YouTube

If you already have a Google account (ie: you use any of Google’s products like Gmail, AdWords or Google+), use those log in details to sign in at www.youtube.com.

If you don’t have a Google account, go to YouTube and click ‘Sign in’ on the top right of the page. Click ‘Create Account’ and fill in the required information.

Once you’re signed in, you’re free to watch the videos, but you need to create a ‘channel’ (like a profile page) to be able to load your own.

NB: YouTube accounts are linked to a Google+ page. If you don’t already have a Google+ page as you set up your channel, it’s going to make one for you! Don’t worry, I’ve got a great post about using Google+ to promote your business too.

Create your YouTube business channel

These steps apply to desktop or laptop users, using a browser. Some of the options are different for mobile/app users.

Once you’re signed into YouTube, click on the profile image top right, and then on the cog next to the ‘Creator Studio’ button in the drop down box. This will take you to an ‘overview’ page.

On the overview page, click through the ‘Create a channel’ link next to your email address. On the following screen, click ‘To use a business or other name, click here’. If you have a Google+ business page, you’ll see this as a channel option on the following page. If not click the ‘Create a new channel’ button to make a new one.

Now you have a new channel and you’re ready to make yourself at home!

Customise your channel for your brand

Just like other social media profiles, you can customise the content of your YouTube channel to reflect your business and brand personality.

Your main channel page contains a number of menu items including ‘Home’ and ‘About’. If you can’t see them, click on the ‘My Channel’ menu item to the left of your screen.

Your small square channel icon feeds in from your Google+ page (you need to go there to change it) but you can add a big image as your channel header. Colourful images are great for attracting the eye so use it to show off your product ranges or another image that supports your brand.

To make changes to the channel header area, hover over the cover photo area to reveal the pencil icon to the right. Click on it to change the image, or add links to your website and any other social media accounts you have.

You can also add ‘Featured channels’ you like in the box to the right.

Next, head over to the ‘About’ tab and write an interesting description for your users in the ‘Channel description’ box. It will take up to 1,000 characters.

Upload your videos

YouTube lets you upload videos in any of the following file formats: .MOV, .MPEG4, .MP4, .AVI, .WMV, .MPEGPS, .FLV, .3GPP, .WebM. If you want to change the default settings for the videos you load, go to your ‘Video manager’, click ‘Channel settings’ and then ‘Default’.

To load a video onto your channel, click the ‘Upload’ button at the top of the page and browse for the file you want to upload. You can even create videos here!

To make the most of web searches, use appropriate keywords in the title and description of your video and use the tags facility.

When you’ve chosen your video, select the privacy setting and hit ‘Publish’, ‘Done’ or ‘Share’ (it’s different for each privacy setting) to send it to your live channel.

To learn more about making video for your business, check out my last post.

Promote your YouTube presence

Your hard work’s not over yet! To get the most attention to your new channel, add a link to it on your Spiffy Store, in your newsletters and other social networks you play in. And keep making those videos!


10 ways to promote your store using LinkedIn

You might not think it, but there are plenty of ways to promote your online store using the professional network, LinkedIn. Here’s 10 for you!

1. Set up a Company PageLinked Laptops

Just as you can create a personal LinkedIn profile to showcase yourself, you can do the same for your business. They’re called Company Pages and they provide you with a free and easy way to promote your store online.

Before you can set up a Company Page, you need to have your own personal LinkedIn page (if you don’t yet have one, head over to my previous post on LinkedIn profiles for some tips on getting started).

It’s quite easy to launch a Company Page, but there are a few requirements you need to meet before you can go ahead, so read through those first or you may quickly get frustrated!

When you’re ready, here’s how to make it happen. Continue reading

A simple guide to Twitter for online retailers

Birds tweeting

Let me introduce you to Twitter, the social network where a little goes a long way.

According to one of their recent studies, 60% of the respondents had bought from a small business because of Twitter.

It’s certainly an opportunity to be considered.

Set up a free account

Just like any other social network, you’ll need to set up an account profile.

Head over to www.twitter.com to start.

As you go through the sign up process, you’ll be asked to create a username or ‘handle’ (@xxxxxx) of 15 characters or less. This is the name you’ll be known as on Twitter, so use your business name or a version of it if the exact name isn’t available.

Add your logo as your profile photo, a 160 character ‘bio’ and header image to reflect your business’s personality, and your website url. If you’re on other social media channels, your profiles should all say a similar thing to keep your brand consistent.

Ready for action? Start following!

Start your Twitter action by following a bunch of accounts that post information that would be useful to you and your customers. Their tweets will then appear in your own feed. You can also follow your competitors and keep an eye on their activities.

You can find them using the search box on the top right of your twitter profile. The basic search function here is fairly generic and brings up a wide range of results so I like to use Advanced Search https://twitter.com/search-advanced (you can also find this on the left hand panel once you’ve performed a regular search). This will give you a more targeted search. It’s also a nice way to find things to pass along.

What to do with 140 characters or less

Twitter only allows you to post a maximum of 140 characters, so you’ll need to get to the point pretty quickly!

With some high level marketing objectives in mind, like driving traffic to your website, growing your reach and creating leads, you can dive straight in and start posting. Hit the blue ‘tweet’ button in the top right corner of your Twitter page to begin.

Here are some of the things you can do with a tweet, but in general, as long as you behave like a human being, not a business or a brand, you’ll win friends.

> Point to some interesting content you’ve found on the web. Because of it’s brevity, Twitter is mostly used to post links to interesting content, yours or elsewhere on the web. Start with a tempting sentence to encourage a click and follow it with the url of the content.

> Retweet interesting tweets you find. Hit the ‘turn left’ symbol below a juicy tweet and it will appear in your followers’ feeds.

> Reply to other tweets. Start a conversation by hitting the ‘loop’ symbol below a tweet and type a reply. This conversation only appears in the feeds of people who follow you both, but there’s a neat trick to get all your followers to see it. Put a full stop (.) in front of the @handle of the person you’re replying to.

> Tweet a question. Do you want to know what your followers think about your products? Ask them! They may give you ideas for new stock, for example.

> Tweet a promotion. Do you have a sale coming up or new stock in? Use a tweet to promote it to your followers and include an image. Don’t do it too often though. Followers like information and too frequent promotions will make you come across as pushing sales.

> Offer a quick tip. Share a nugget of advice with your followers. Perhaps a cool way to use your products.

To increase your chances of being found, use a # (hashtag) in front of a relevant term, like #shirts, or #kitchen. Keep it down to one or two per tweet – too many and it gets confusing!

When you need privacy, send a Direct Message

If you want a private exchange with another follower, use a Direct Message instead of a tweet. You can only send and receive Direct Messages with someone who is following you, and visa versa.

Twitter is the new customer service tool

In addition to building a sense of community around a brand, Twitter is fast becoming a popular customer service tool for businesses.

If they’re already on Twitter, people will often use the network to ‘talk’ directly to a company rather than use the phone or email. As a business owner, this is both good news (It’s quick and inexpensive to use) and bad news (complaints are in public view). But ignore it at your peril!

If you’re not sure how to manage this kind of activity in the public domain, read my post on handling complaints on social media. It’s full of tips.

Paying to advertise on Twitter

Just like the other major social networks, Twitter offers business users paid advertising so you can get in front more people. Here are a few examples.

twitter ad example

Twitter ad example 2

Twitter Ads campaigns are focused on a marketing goal, like getting more followers or website visits.

The ads are based on a pay-per-action model, so you’ll only pay when someone interacts with the ad, not for just for displaying it. And because you can target the audience very tightly, there’s less budget wastage.

The easy-to-use set up tool walks you through the process from ad creation to selecting the audience and budget so you can be up and running in no time. The Twitter Campaigns dashboard will show you how your ads are performing so you can make any necessary adjustments like increasing the budget if you’re seeing the results you want.

I’ve only scratched the surface of Twitter Ads here. Visit their business website to discover more and sign up to play.

Now you’re up and running, don’t forget to add a Twitter follow icon, linking to your account, to your Spiffy store, and put a link in your email signature for good measure!

Reach more people on Facebook with Facebook ads

Facebook-audienceHaving a free Facebook Page for your store is a great start to growing your online community, but it doesn’t guarantee that everything you post will get in front of everyone that likes and follows you.

If you want to reach more people on Facebook, you can back up the free activity you’re enjoying on your Page with paid Facebook ads.

These ads are charged on an impression basis, not per click like Google AdWords, so you’ll pay every time your ad appears to someone. Your message can be super-targeted though, so you only be reaching the kind of people you really want.

Get your strategy worked out before you begin

Before you leap into creating ads, you’ll need a campaign strategy. Answer these key questions to focus your campaign and help you get better results.

Why are you creating this campaign? Are you after more likes on your Page? More sales on your website? Be sure of your goal as it’ll shape the whole campaign. Boosting sales on your website can be a good objective for online retailers.

What are you going to promote? Based on your campaign goals, choose what you’re going to promote. Is it a specific product or category of products, or a will it be a post, your latest offer, or an event?

Who do you want to see your ads? Facebook ads can be ultra-targeted, so decide on the characteristics of the person you want exposed to your ad. What type of people do you think would respond best?

When are you going to advertise, and for how long?

Once you’ve worked out your campaign strategy, you can get to work on your ads!

The three types of ads available to you

Facebook currently has three different ad formats. The images are from Facebook’s handy ads guide.

  1. Post ads for the desktop news feed

Facebook-desktop-ad

This large ad appears as a post in someone’s newsfeed as viewed on a desktop or laptop.

It’s particularly good for encouraging comments or actions on your posts as readers can interact with them just like regular posts from their connections. You can use it, for example, to push a post you’ve already made to a bigger audience.

  1. Post ad for the mobile news feed

Facebook-mobile-ad

These post ads are built specifically for use with mobile-optimised sites. Only use this if your site has a responsive theme.

  1. Right column ads

Facebook-rcolumn-ad

These ads appear in the right hand column of a Facebook newsfeed.

Ready to start making ads?

Just one more thing. Make sure you understand Facebook’s advertising rules before you start. Once you’ve read them, hop over to their site to create your ad.

>> Choose an objective for your campaign

You’ll need to choose a campaign objective as the first step in creating a Facebook ad (see, that bit about strategy above has come in handy already!)

Once you do that, the ad tool will prompt you what to do next as you go through the ad creation process.

>> Create your ad

Specific details to create the ad layouts can be found here.

You’ll need upload at least one high quality image for your ad (the recommended image size for most ads is 1200 x 627 pixels) and come up with a headline, text, landing page address and call to action button if applicable to that ad type.

When you write your ad copy, keep your headline under 25 characters and your ad text under 90 characters. This will help it display better. Focus on just one thing as you write and try to show the reader the benefit they’ll get from whatever you’re promoting.

If you’re advertising a product, don’t make your homepage the landing page. Point people to the specific product page so they can buy the item straight away and not have to look for it.

As you create your ad, remember you’re advertising on a social media network. Make your ads friendly, likeable and interesting. You’ll be able to preview the ad in each of the formats when you’re done to make sure it looks good and reads well.

>> Select your target audience

Because Facebook holds detailed information about its users, you can target your ad very tightly. This saves paying to advertise to people you’re not interested in reaching. Location, age, gender, relationship status and even interests are all options available.

As you make your selections, Facebook will indicate the number of people who fit that criteria and could see your ad. The number of those you actually get in front of will be limited by your budget.

>> Define your ad budget and schedule

You can set a budget to be spent per day, or over a specific timeframe, and schedule your ads to run continuously or within a set timeframe. Don’t forget to set an account spend limit to ensure your ads stop running once you’ve spent this amount.

Once your ads have been approved and your billing information is recorded, you’re good to go!

Finally, monitor your ad

Every time your ad shows, you’ll be charged a fee, so keep checking your campaign performance in the ads manager.

If you’re not seeing the results you want, try testing out other versions of ad content. Changing the image, text and landing page may get you better results.

Launch a Facebook Business Page to grow your online community

Facebook is the world’s largest social network.

Over a billion people use it to connect and share things that touch their lives.

Its sheer size and level of interactivity makes it a good way to build relationships for your business too.

Here’s how to get started.

Set up a separate Facebook Page for your business

Many of you will already have a personal Facebook Profile, linking you with your friends and family across the world. But personal Profiles are not intended to be commercial, and friends don’t like being sold to much anyway!

It’s better to set up a separate Facebook Page for your online store. Pages are built specifically for businesses, and offer unique tools to help with marketing. As it’s separate from your own profile, you won’t bother your pals too much either!

Go to https://www.Facebook.com/pages/create.php and choose your business type to start. Then fill in the form fields and follow the onscreen instructions.

Just like a personal Facebook Profile, you can add a profile picture and cover photo to customise your Page. I suggest loading your logo (min 180 x 180 pixels) as the profile pic and a creative, high quality image depicting what you sell (min 399 x 150 pixels) as the cover photo.

Get your Page working for you

Once you’ve filled in all the basic information for your page, and added any extra tabs and apps you want, it’s time to get to work promoting your business.

> Invite your Facebook friends and contacts to like your Page

> Grab a username: Make a unique web address for your Page. It’ll make it easier to promote in places where you can’t put a link, like business cards or flyers. Go to https://www.facebook.com/username for instructions.

> Make posting a habit: Start by posting something every day if you can, and respond to any comments you get the same day. Remember, it’s a conversation, not a broadcast!

> Post a variety of content: The key to keeping your followers is posting a variety of interesting content, not just boring one-liners. Mix up sales promotions with other non-salesy material that a typical customer would enjoy like:

  • Photos and videos – a 2012 Hubspot study found that photos on Facebook generate 53% more likes than the average post. So have fun with images like pictures of your latest products, behind the scenes photos or inspiring images you’ve found (take care with copyright). You can use free online tools like Canva to create quality images with text on top.
  • News – new product in your store? Opening up in the real world? Let your followers know with a friendly news post.
  • Promotional offers – spread the word about a sale, discount or freebie.
  • Blog posts – post a link to new articles on your blog.
  • Harmless funnies – don’t be afraid to use humour. Posting a relatable funny can put a smile on someone’s face and make you more human.
  • Questions – want to know what your audience thinks? Ask them! Question posts are popular for attracting comments, and the feedback can be useful for product development or service improvements.
  • Tips – show the different ways to use your products.
  • A trending topic – if something in the news is relevant, just jump on that media bandwagon!
  • Other articles – link to articles from around the web that your audience may like.

You can discover which types of post are most popular with your audience in your Page Insights report, and do more of the same.

> Boost your posts: Facebook doesn’t guarantee all your posts will show in your followers feeds, so you can boost important ones by paying and hopefully reaching more people.

> Promote your Page on your Spiffy Store: Check your theme documentation for details on how to do this.

Pages are a useful way to build your online audience for free, but they aren’t the only way to promote your store on Facebook. In the next marketing post, we’ll look at using Facebook paid advertising to tell even more people about your cool stuff.

How to handle customer complaints on social media

how-to-handle-customer-complaints-on-social-mediaIt’s inevitable in business. Now and again you’re going to do something that annoys a customer and they’ll want to complain about it.

Dissatisfied customers used to pick up the phone or pen you a stern letter to air their grievances. But now it’s easier, and perhaps more satisfying for them, to jump onto social media and give your business a good ear bashing in full public view.

It’s like your dirty laundry hanging out for the world to see.

Fret not! You can take steps to improve the situation. Here are some suggestions for dealing with those unmentionables.

DO…

DO keep your virtual ears open for signs of discontent

Monitoring what’s being said about your business online will give you valuable insights in general, but it will also alert you to customer issues that need addressing.

Check your social networks for new comments every day and sign up for free tools like Google Alerts and Social Mention so you watch for conversations across the wider web.

DO keep any negativity in perspective

People are more likely to shout out when they’re unhappy than when everything is just fine. See a negative review or comment as an opportunity to improve and impress.

DO respond quickly

As soon as you’re aware of a problem, jump in and respond. The longer you leave it, the more disillusioned the individual may grow as they feel you’re not listening to them.

DO take action

Unhappy customers don’t just want an apology – they want to know how you’re going to fix their problem. If you’ve mucked up, apologise sincerely and explain what you are going to do to rectify the situation. Show them you’re human and show you care.

If the complaint is a misconception, reply with polite but factual information.

DO take the conversation offline if you need to

Once you have publicly acknowledged the feedback, take angry or aggressive customers away from the public forum and resolve their issues by phone or email directly. You can return to the public forum once the issue is resolved to post a friendly follow up.

DON’T…

DON’T ignore or delete negative comments

You’ll infuriate an unhappy customer if you ignore or delete their feedback and this can lead to further aggravated remarks. Reply to negative comments openly and respectfully and only delete comments if they are actually offensive or illegal.

DON’T get emotional

Whilst it’s natural to feel defensive when your business is under attack, put your emotions aside whilst you deal with the complaint. Try to understand that your customer is just disappointed because you didn’t meet their expectations in some way.

DON’T keep your strategy for handling complaints to yourself

Make sure any of your staff that may be exposed to negative comments about your business understands how you want them handled.

Overall, focus on giving your customers a great experience. Lessen the likelihood of negative feedback by always putting the customer first. After all, prevention is better than cure!

Why you and your store should be on Google+

why-you-and-your-store-should-be-on-Google-plusI know what you’re thinking… “Oh no, not another social network!” But if you want to improve your online store’s search rankings and be seen by more people, hear me out.

Whether you are a fan of social media or not, social networks and the endless chatter they support are increasingly important to the growth of your business.

Word of mouth has always been the most effective form of advertising. People tend to buy from those they like and trust and social media is a great way to build a relationship with your prospective customers.

Not only that, but Google, the king of all search engines, has recently focused on social signals in its search algorithms. This means the more people are talking about you and sharing your content, the better your search ranking is likely to be. Shares, likes, comments or +1s of your posts act like recommendations and boost SEO.

Google+ has chalked up more than 400 million users and is now one of the top six social networks in the world. It’s fast becoming recognised as the place to connect with like-minded businesses and people you may not already know (you’re not meant to connect with people you don’t already know on LinkedIn).

More importantly, Google+ is owned by the world’s most popular search engine. Let me say that once more for effect. Google+ is owned by the world’s most popular search engine. Posts, articles, pictures and links on a Google+ page are favoured in Google’s organic search results and status updates are indexed immediately, meaning they will show up in relevant searches right away.

By keeping your Google+ page up to date and interacting through it, you have more chances of being found online. Do you like the sound of that?!

If you’re keen to put your business on Google+, you’ll first need your own Google+ page. If you don’t have one already, set up an account here.

Before you create your business page, have the following to hand: a catchy tag line, a concise introduction that includes links to your website, your logo at 250 x 250 pixels in size, a hi resolution photo that represents your business and URLS of your other social media accounts.

Once you’re set up, search for people and companies to add to your ‘circles’. Look for those who would have something in common with your line of business.

Above all, post regular content, share your ideas, photos and video, and most of all, share other people’s stuff. Think wider than just your niche – build a personality for your brand and have fun!

Click here for the official step-by-step guide to setting up a business page on Google+.